In the previous lesson, we learned about How to open files, create files and save files in Photoshop. In the next lesson, I will show you how to use the Crop tool to crop images, how to use Canvas Size, Image Size to resize images.
How to use the Crop tool
First you open Photoshop and open any image (if you forgot how to open the file you can see the instructions here). I open the picture of Chii cat for practice, you can download the image I used at the end of lesson. After opening the file, select the Crop tool (shortcut C) on the toolbar as shown below.
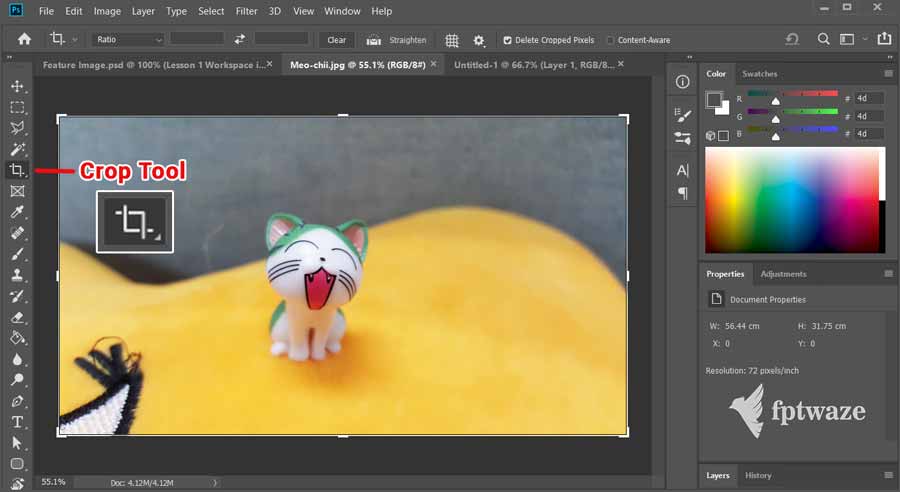
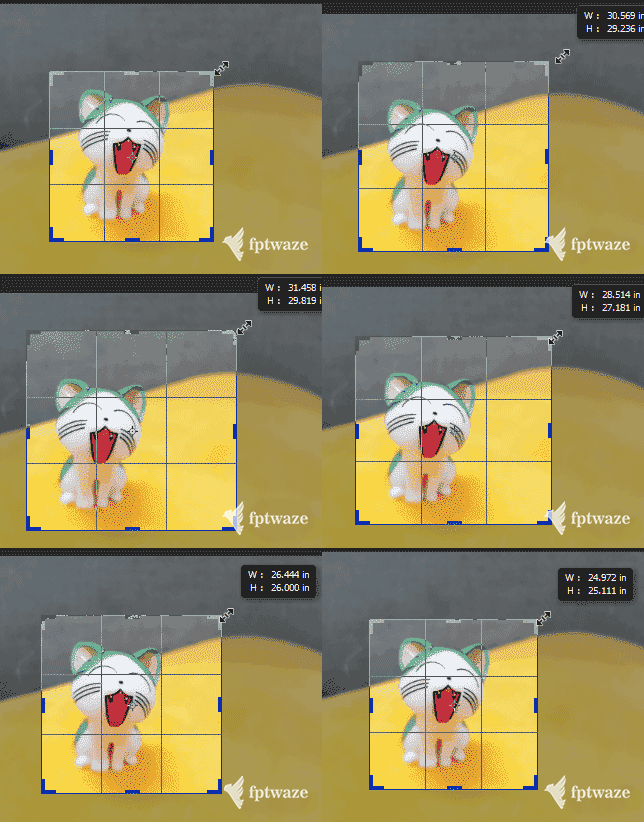
You will notice that around the work area will be surrounded by a rectangle with a dashed border. You can use the mouse to drag the edges and corners to change the position, area, and corner of the image in this rectangle. After pressing Enter, the area in the rectangle will be the part of the image that is retained after cropping.
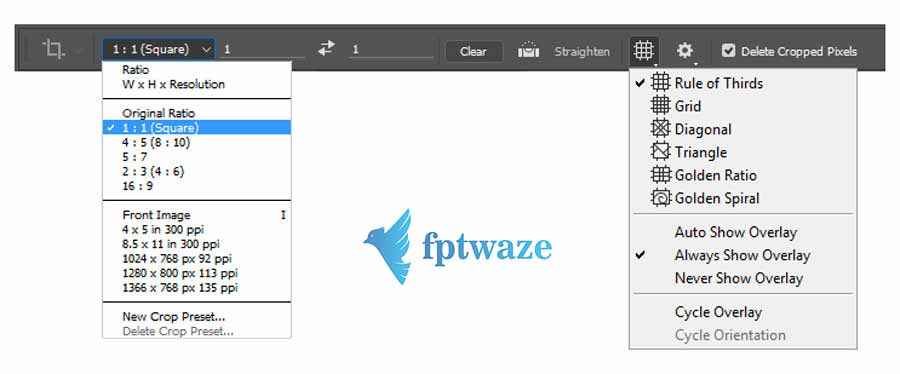
To choose the exact width/height ratio for the frame, you can select Ratio in the option box displayed at the bottom of the menu bar. In addition, you can also choose the type of navigation line displayed when Crop the option bar.
How to resize photos
In Photoshop there are two tools to resize images: Canvas Size and Image Size.
- Canvas Size is used when you want to change the length and width of the canvas without changing the size of the image inside.
- Image Size is used when you want to change the width, the length of the canvas and the size of the image inside to change accordingly.
I’ll write more about it below.
Canvas Size
To use Cavans Size, you access the path: Menu -> Image -> Canvas Size. The Canvas Size dialog box displays information about the current image size, the size of the width, the height of the change, and the direction of the image change. You can see the picture below illustrating the use of Canvas Size, not too difficult to understand, right?
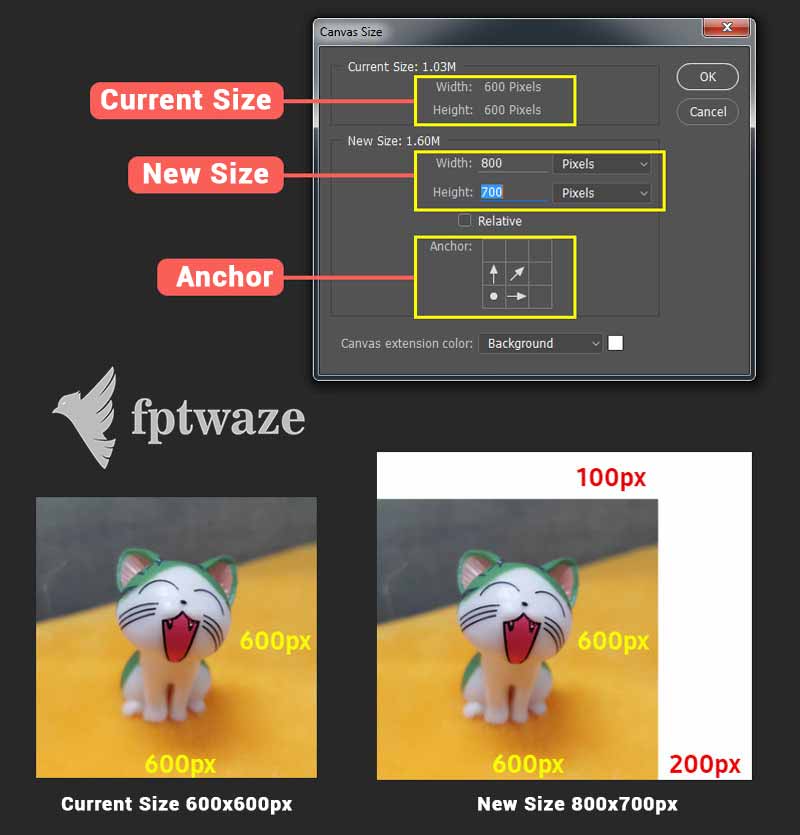
Tip: In the Canvas Size box, there is a check box to select Relative. If you increase the width to 200, the length to 100, instead of having to enter the image size 800×700, you just need to enter 200 in the width, 100 in the length. Try it out.
Image Size
This function is easier to understand, to use you go to Menu -> Image -> Image Size. The Image Size dialog box shows options for resizing the length, width, and resolution. This is used when your image is as large as 6000 x 6000 pixels, you reduce it to 600 x 600 pixels to edit quickly and upload to the web less heavy, for example.
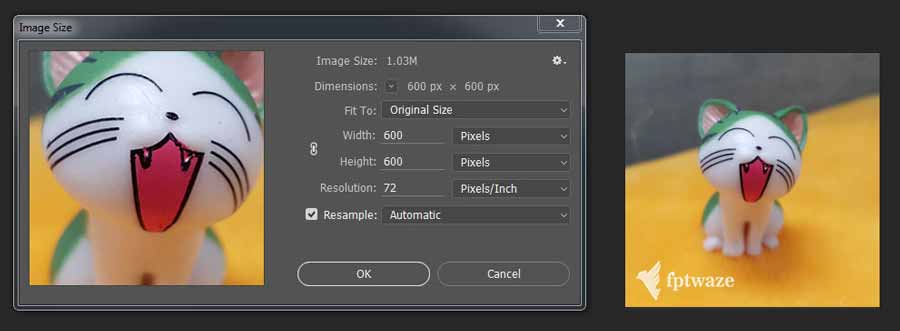
The Image Size dialog box also has a Resample check box that allows you to resize the image when resizing the image. For example, you have an image of 100 x 100 pixels with a resolution of 72 pixels/inch, you resize it to 200 x 200 pixels. So that Photoshop doesn’t have to interpolate more pixels, the resolution will automatically drop to 36 Pixcels/inch. I usually leave Resample automatic, you can try each case to see the difference in quality. One thing to note is that if you increase the image size while keeping the resolution, the image quality will be lower, while reducing the size, the image will only be smaller, the quality will remain the same.
OK, so we have learned about the Crop function, resizing images with Canvas Size and Image Size. If you notice, Crop and Canvas Size can both produce similar results. Which tool to use later depends on your preferences.
The next lesson will be a pretty important one: how to work with layers in Photoshop.
Layers are an indispensable part of learning Photoshop -> Click here to see the next post
Click here to return to the basic Photoshop series article category
Chii cat image file used in the article -> Download