In the previous lesson we learned about the Canvas Size and Image Size Tools. Today I will show you how to work with Photoshop Layers.
Contents
Introduction to Photoshop Layers
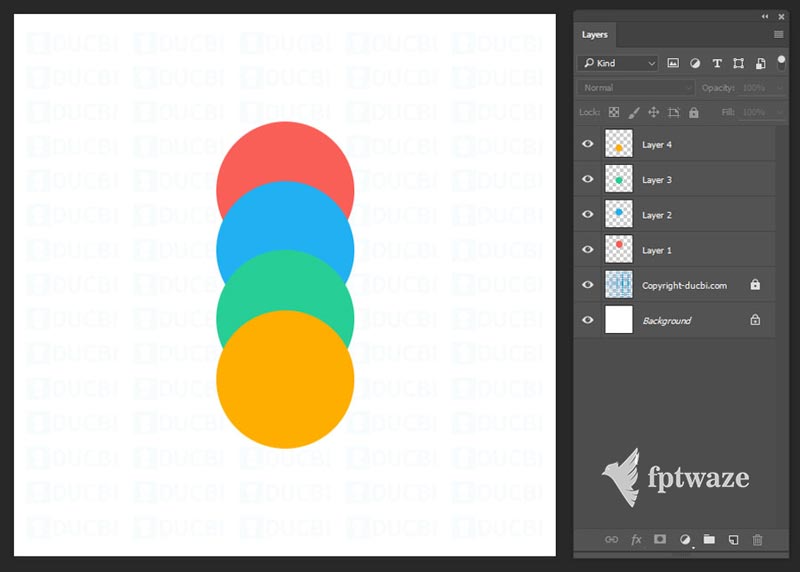
It can be understood simply that Layers are image layers, the previous layer is placed on top of the next layer to form a complete image. To make it easier to imagine you can see the illustration below, in the picture is a Photoshop file with 4 layers of circles arranged in the order Orange -> Green -> Blue -> Red. The layer placed on top will mask the layer below. You can download the Photoshop file at the end of the article, I will guide you to learn about Layers based on visual examples for easy understanding.
Elements in the Layer Panel
The Layer Panel is where you manage all Layer-related tasks such as adding, editing, creating masks, hiding layers, changing blend modes, etc. By default, Photoshop has already enabled the Layer Panel located in the lower left corner for you. You can optionally hide the Layer Panel by going to Menu -> Window -> Layer (or using the keyboard shortcut F7).
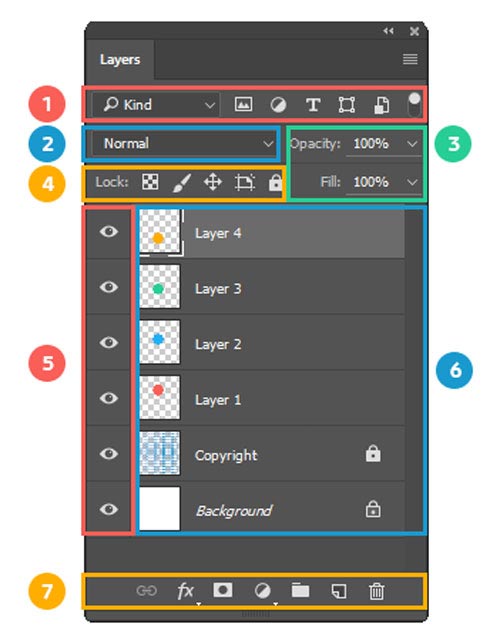
The Layers panel includes the following main components:
1. Option to show and hide Layers
Layers can have many different types such as images, text, masks, etc. This function is used when you have a lot of layers and only need to display a layer type such as Text to easily change the text content, for example. . This one doesn’t use much either.
2. Blending mode
By default, a layer above will mask the layer below. However, you can choose the blending mode for the layer above to create special effects. For example, in the image below, I have a photo of the sky but it is too cloudy, I find a photo with lots of clouds and put it on top and choose the blending mode for it to be Overlay. The result is a cloudy sky image. You can try each Blend mode to see its effect.

Adjust Layer Transparency
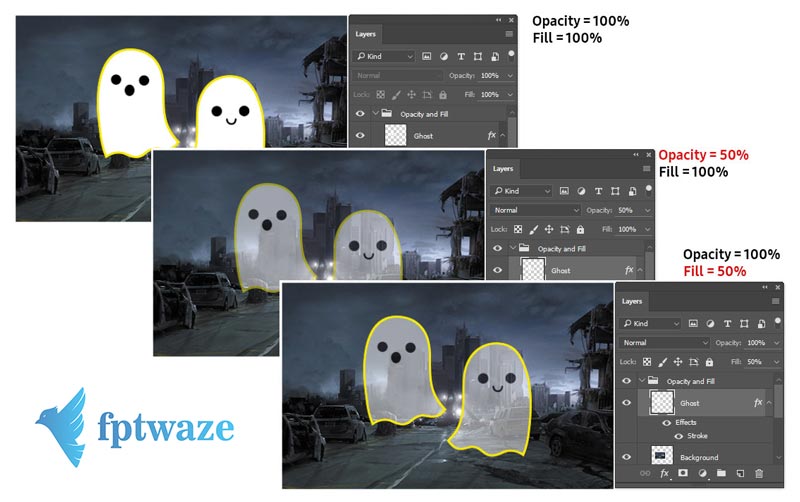
You can customize the transparency of a layer by changing the Opacity parameter. In addition, for layers that use border effects (stroke – will learn in Layer Style), you also have the Fill option, Fill will keep the layer’s border, only the inner part is transparent. You can see the ghost illustration below. With the Opacity = 50% option, both the ghost and the border are blurred, and with the Fill = 50% option, only the inside of the ghost is blurred, the yellow border remains.
Layer lock option
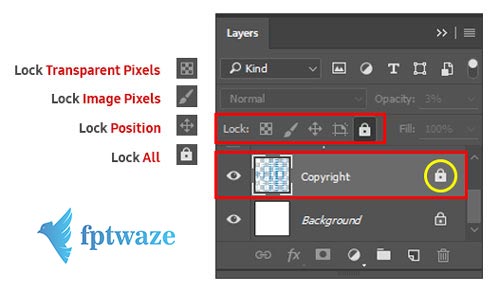
When there is a layer you want to fix in place, you can lock it. There are options to Lock transparent pixels, Lock image pixels, Lock position and Lock all. When a layer is locked, a lock icon will appear to the right of that layer.
Show Layers
Next to each layer there is an eye icon. You click to hide and show the Layer.
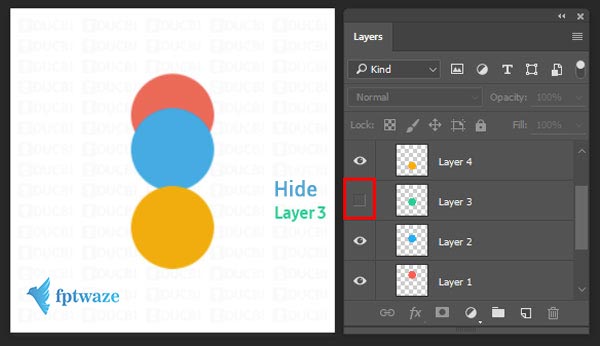
List of Layers
Each Layer will display on a row, you can see the thumbnail image (Thumbnail) and the Layer name. You can double click on the text to change the Layer name

Toolbar
In turn from left to right are Layer style, Layer Mask, Adjusment Layer, Group Layer, and Delete Layer. About Layer style, Layer Mask, Adjusment Layer, I will detail in Layer Style and Layer Mask
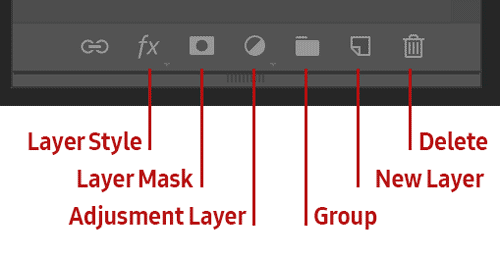
Group Layer: Used to group layers into a Group for easy management. To group, you select multiple layers by holding Ctrl or Shift and then clicking on each layer, then pressing the Group icon or the keyboard shortcut Ctrl + G.
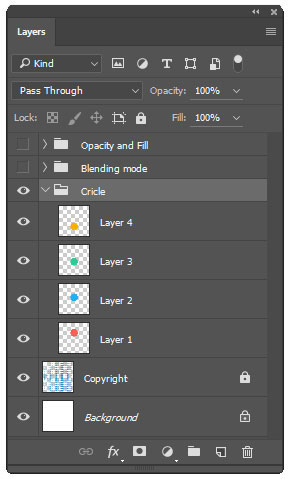
Delete Layer: Use when you want to delete Layer, this is too simple, isn’t it ^^.
So we have finished understanding the composition of the Layer Panel. The next lesson I will learn about: How to move, Resize layers
Click here to return to the category of basic Photoshop series lessons
You can download the Photoshop file used for this lesson at the following link: Layer Practice Exercises
Share if you find the article useful, thank you ^^