The content of my first post focuses on introducing the workspace in Photoshop, including the following parts:
- Photoshop versions.
- Working environment in Photoshop CC.
- Three basic operations are often used with the working environment in Photoshop.
- Frequently asked Questions.
Contents
Photoshop versions
Up to now, Photoshop has gone through 10 versions: 5.0, 6.0, 7.0, 8.0, CS2, CS3, CS4, CS5, CS6, CC 2013, CC 2014, CC 2015, CC 2017, CC 2018, CC 2019, CC 2020. In which, according to my personal feeling, Photoshop CC2019 version is the lightest version, suitable for mid-range computer configuration but still full of necessary features. Therefore, in this Photoshop Course, I will guide you on Photoshop CC2019.
You can download all Photoshop version, Portable version in here.
Workspace in Photoshop
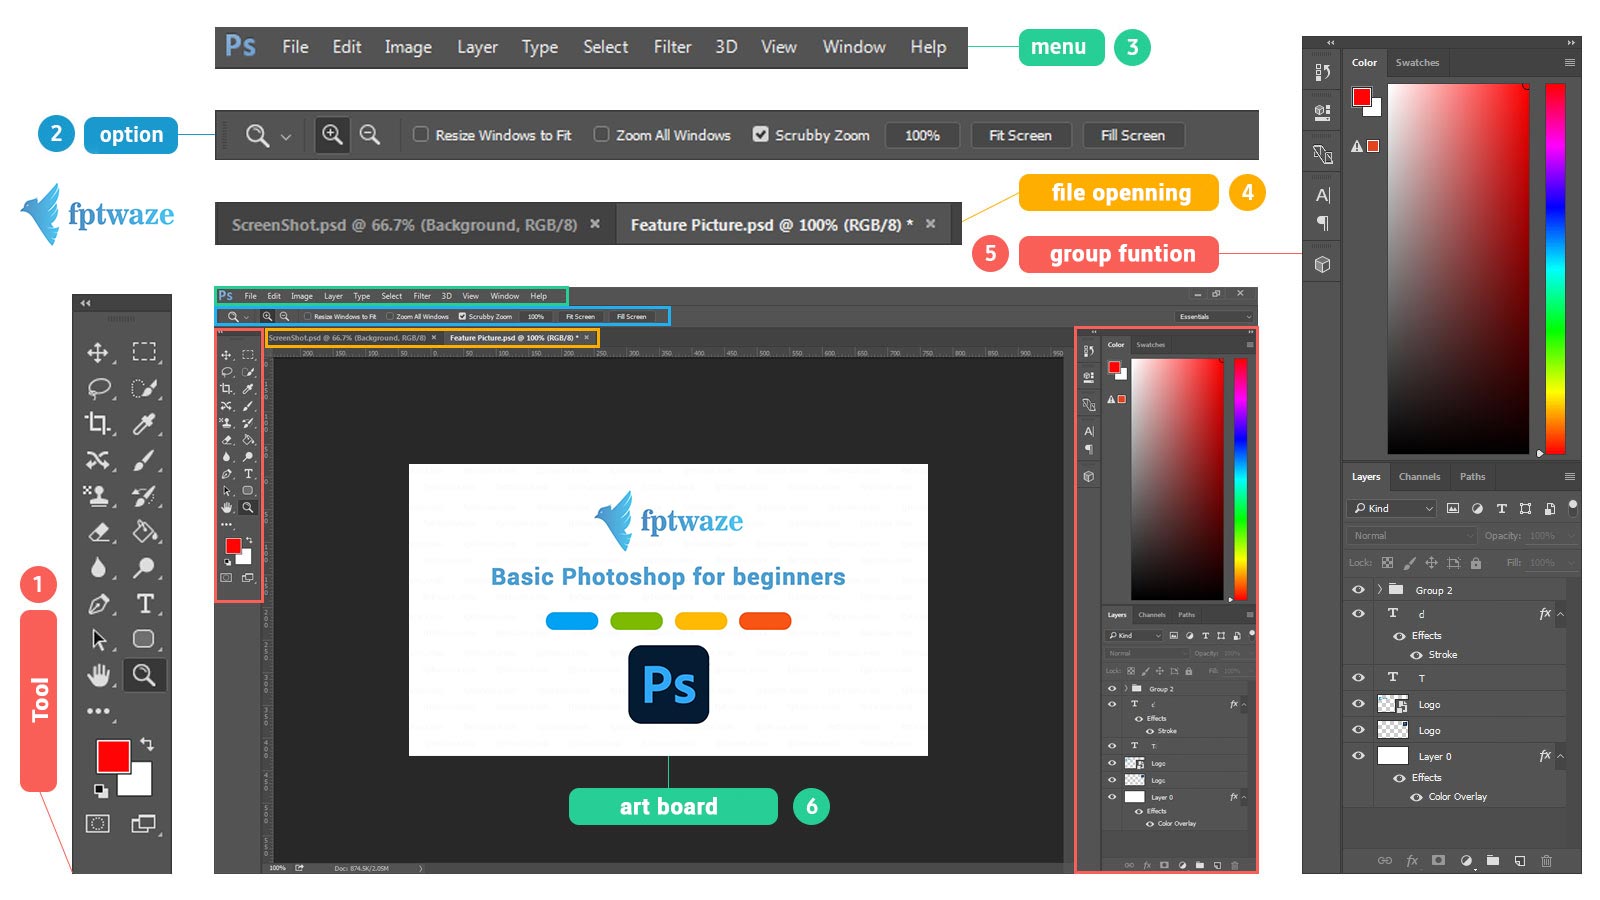
The Photoshop CC interface uses black as the main color tone, highlighting the photo editing frame and creating focus when manipulating. The default Photoshop working environment includes 6 main components as shown below.

- Toolbar (left): Contains tools such as moving the image, selecting an image area, brush, etc. These tools do not change much between versions of Photoshop.
- Option bar (above): When selecting each tool, the options corresponding to it will be displayed here. For example, you select the Text tool to write text, the options area will show options to change the font, size, color …
- Menu bar (above): You can open files, save files, use functions to change colors, use filters… from the menu bar.
- Open files (above the canvas): Lists open files in Tab form. You can quickly move between Tabs with the keyboard shortcut Ctrl+Tab.
- Function panel (right): Contains panels like Layer, Color, History… In Menu -> Window lists all the panels used in Photoshop.
- Work area (center): Contains your art board.
Three basic operations often used with the workspace in Photoshop
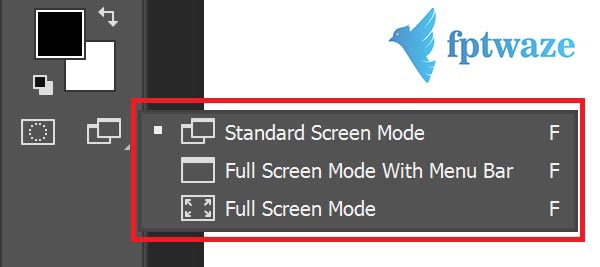
Change Screen mode (shortcut F)
You can switch between the three display modes by pressing the F keyboard shortcut or by clicking the Screen Mode icon under the toolbar. This function will hide the toolbox, option box, increase the workspace area. This function is very useful when you have mastered the keyboard shortcuts of basic functions in Photoshop, no need to use toolboxes anymore.

- Standard Screen Mode: Default Photoshop interface.
- Full Screen Mode With Menu Bar: The Photoshop interface retains only the menu bars, toolboxes and function panels.
- Full Screen Mode: Show only the canvas
Zoom in and out of the work area
- Press the Alt key and roll the mouse wheel, the canvas will zoom in and out.
- Press Ctrl + 0 the canvas will automatically fit the display area.
- Press Ctrl+1 the canvas will return to the actual size
You can also use the Zoom tool (shortcut Z) in the tool panel, but I rarely use it, using the shortcut is more convenient.

Move the artboad
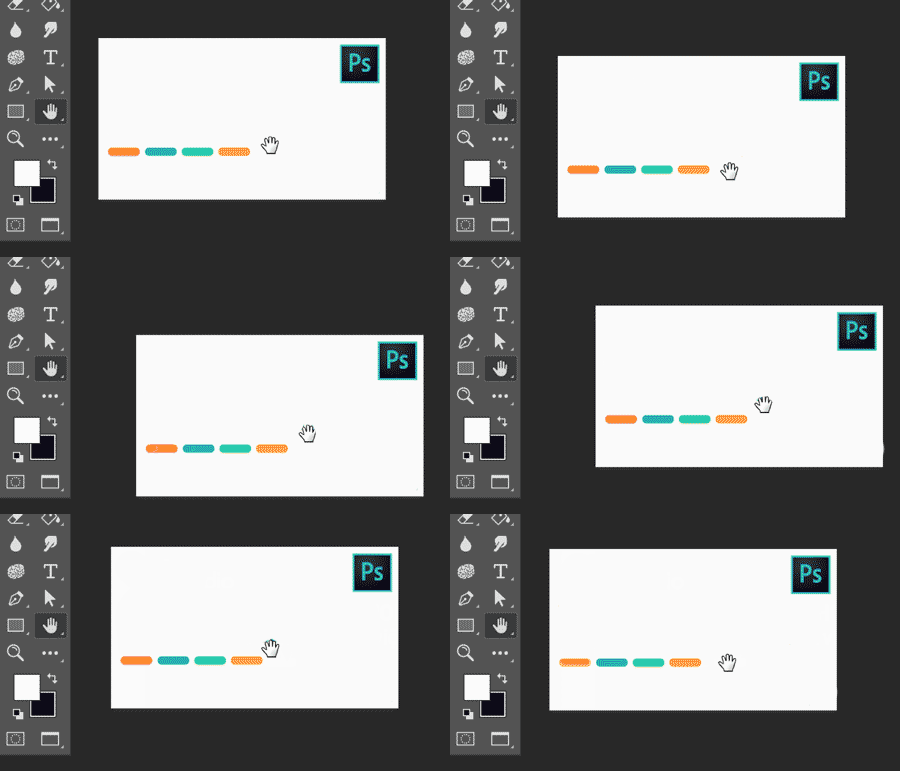
When zooming in on the canvas, you may need to move the artboad, you can use the Hand tool (shortcut H). The Hand tool only works in two Full Screen Modes (reviewed above). If you don’t like using keyboard shortcuts, whenever in Full Screen Mode, you can press the SPACE key, the mouse pointer immediately changes to a hand shape for you to move the canvas as you like. Very convenient, isn’t it?

With what I presented above, you have gained an overview of the working environment in Photoshop, know commonly used operations such as zoom in, zoom out, move the canvas… In the next lesson we We will learn how to open files, create files and save files in Photoshop -> Click to see the next post
Click here to return to the basic Photoshop series article category
Frequently asked Questions
Do I have to use Photoshop CC 2019 as a guide?
No, you can use any version, the basic functions hardly change much. However, I encourage you to use Photoshop CS5 or later. Some exercises I compiled and saved using Photoshop CC, the older version using open may have errors that I did not know in advance.