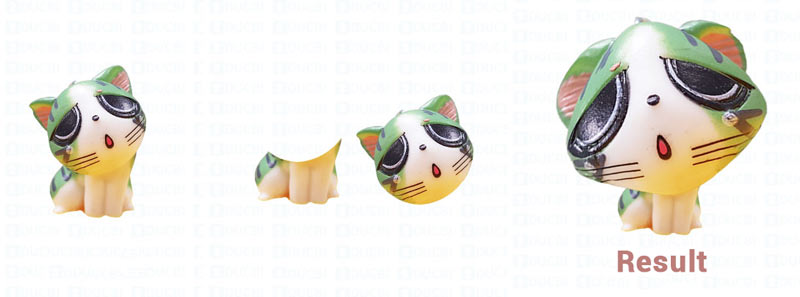
In the previous lesson, we learned about the Layer Panel, this lesson will show you how to move and resize Photoshop layers.
Contents
How to Duplicate Layers
To duplicate a layer you can do one of three ways:
- Select the layer to duplicate then go to Menu -> Layer -> Duplicate Layer.
- Select the layer to duplicate then press Ctrl + J.
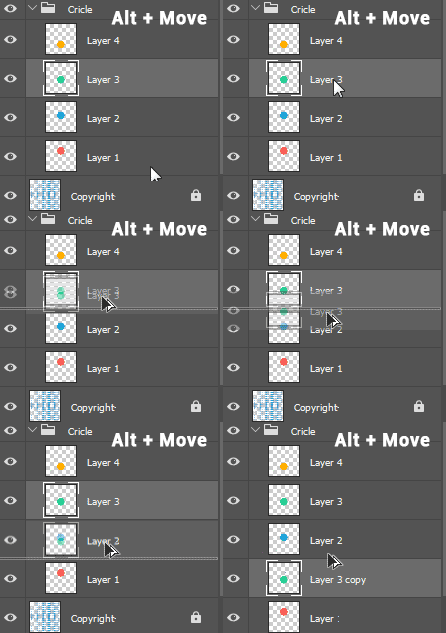
- Select the layer to duplicate then hold Alt and drag the mouse to another location in the Layers panel.
In which the following two methods are the simplest and easiest to use.
How to arrange layers
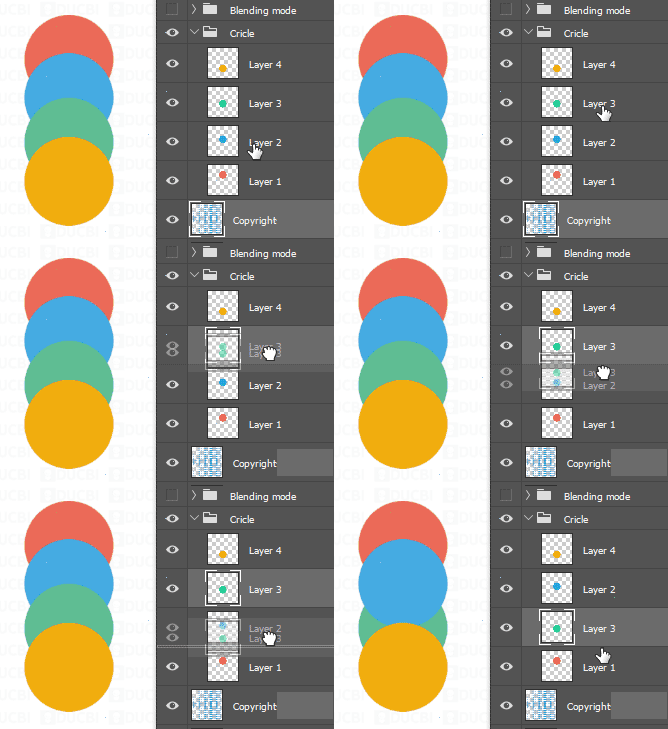
You can arrange the layer order by selecting the layer and then holding the left mouse button and dragging the layer to the position you want. Or you can use the keyboard shortcut Ctrl + [ to move the layer down, Ctrl + ] to move the layer up.
Move the Layer with the Move tool
To move the layer you use the Move tool (shortcut V) in the tool palette. When Move is selected, under the menu bar will appear Move Option.

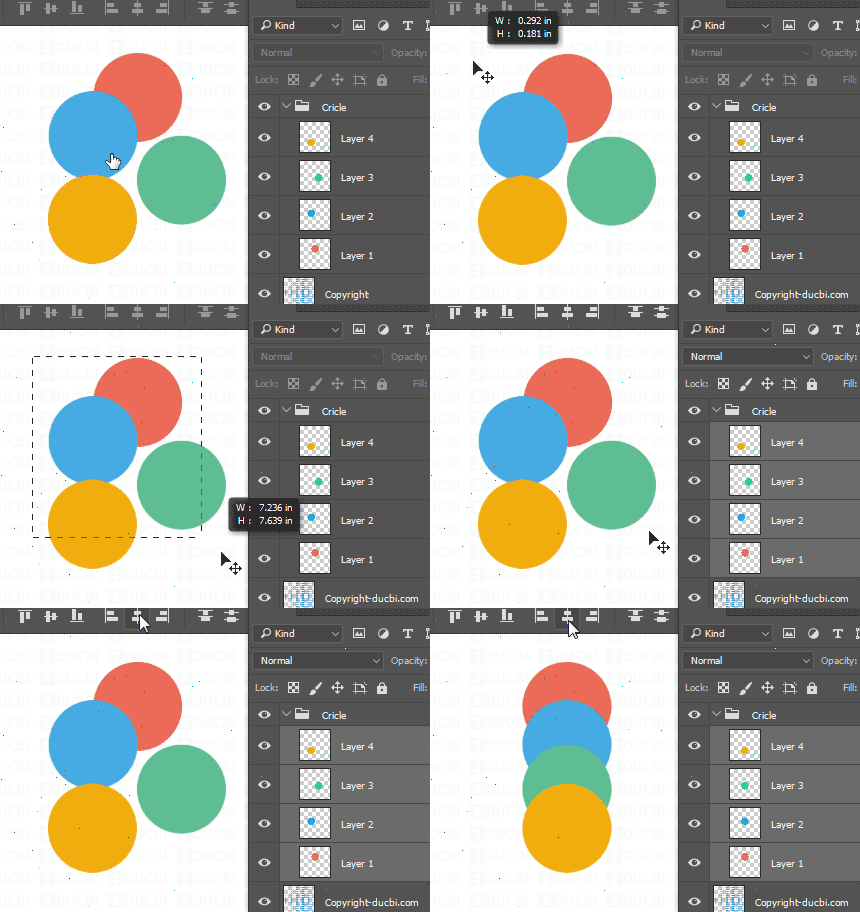
The Move option has an Auto Select Layer/Group option. If you choose Auto Select Layer, just click to select a certain layer in the canvas and then drag and drop the layer to the desired position. If you don’t select it, you can only move the currently selected layer in the Layer Panel. The Auto Select Group option is similar to the Layer, except that the object to be moved is the whole Group.

In addition, you can use the function of aligning layers with the Move tool. For example, if you want the circles to align with each other, just select 4 circles and then click the center icon.
Resize the Layer with the Transform tool
Resize, rotate left and right, layer symmetry… are the operations you often have to do in Photoshop. After selecting the layer you want to manipulate, from the Menu you choose Image -> Free Transform (shortcut key is Ctrl + T). Now a rectangle will surround the Layer, you can manipulate the dragging corners to zoom in, zoom out or rotate left and right as you like.
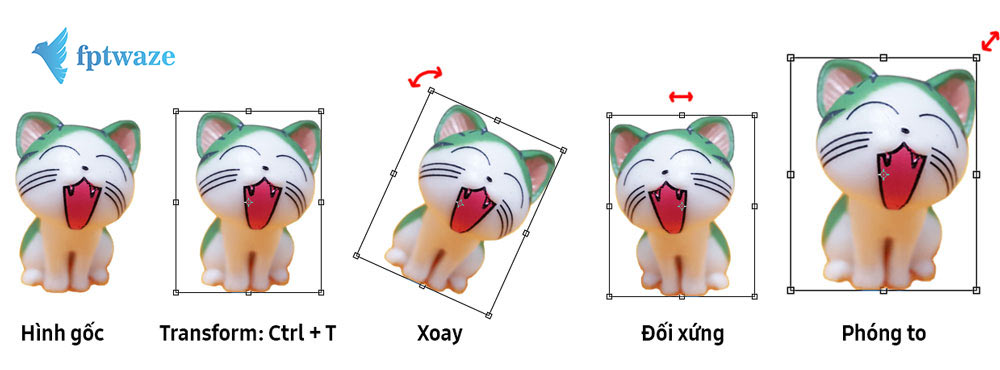
Tip: To not change the ratio of the length and width of the layer when dragging the mouse, press and hold the Shift key.
Transform Options
When you right-click the Transform menu will appear, allowing you to choose the Transform tools that Photoshop provides.
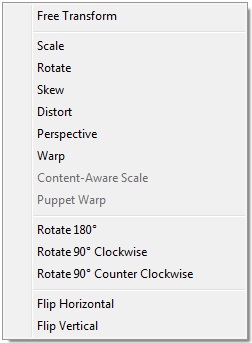
- Free Transform: Resize, rotate the Layer.
- Scale: Change the layer size.
- Skew: Drag the edges of the layer diagonally.
- Distort: Distort the layer by moving the squares on the rectangle surrounding the layer.
- Perspective: Distort the layer according to perspective.
- Warp: Deform the layer according to the perspective freely, can change the curvature of the layer.
- Rotate 180: Rotate the layer 180 degrees.
- Rotate 90 Clockwise: Rotate the layer 90 degrees clockwise.
- Rotate 90 Counter Clockwise: Rotate the Layer 90 degrees counterclockwise.
- Flip Horizontal: Symmetric the layer along the vertical axis.
- Flip Vertical: Symmetric the layer along the horizontal axis.

Studying here, do you find it similar to what you learned in the previous lessons? There is a bit of similarity between the Crop, Resize and Transform tools. So which tool to use for which case, do you have any questions?
- Crop: Used when you want to change the overall layout of the whole image, cut out the unwanted excess.
- Resize: Used when you want to resize to reduce the size of the output image file. Does not change the composition or distort the image.
- Transform: Used when you want to enlarge, reduce or distort an object (Layer) in Photoshop.
Summary
Through this lesson, you have mastered an important tool used to crop images in Photoshop. I have a small exercise below for you to practice.
Once done, let’s move on to the next lesson: How to use Layer style Photoshop.
Click here to return to the category of basic Photoshop series lesson
Link to download Photoshop files and exercises
I have a Photoshop file with 2 layers Body and Head of Chii cat, please use the Transform tools you just learned to get the resulting file as shown. Link to download Photoshop File here.
